Going through Internet websites on game-art you can see how popular the topic of weapon is nowadays. A lot of unexperienced graphics come up with the idea of creating their own object to a portfolio. Unfortunately, they treat the object the same as those which are part of the environment. As a result they create something that looks like a rifle but can be only hanged on a wall.
My first experience in weapon modelling was when I started working on Deadfall Adventures. I had already made some steps in working with models but had no idea about modelling for a FPP, therefore, had a foggy idea of what to do. I have managed to make all the possible mistakes. Fortunately, things were improving with every model / project I worked on.
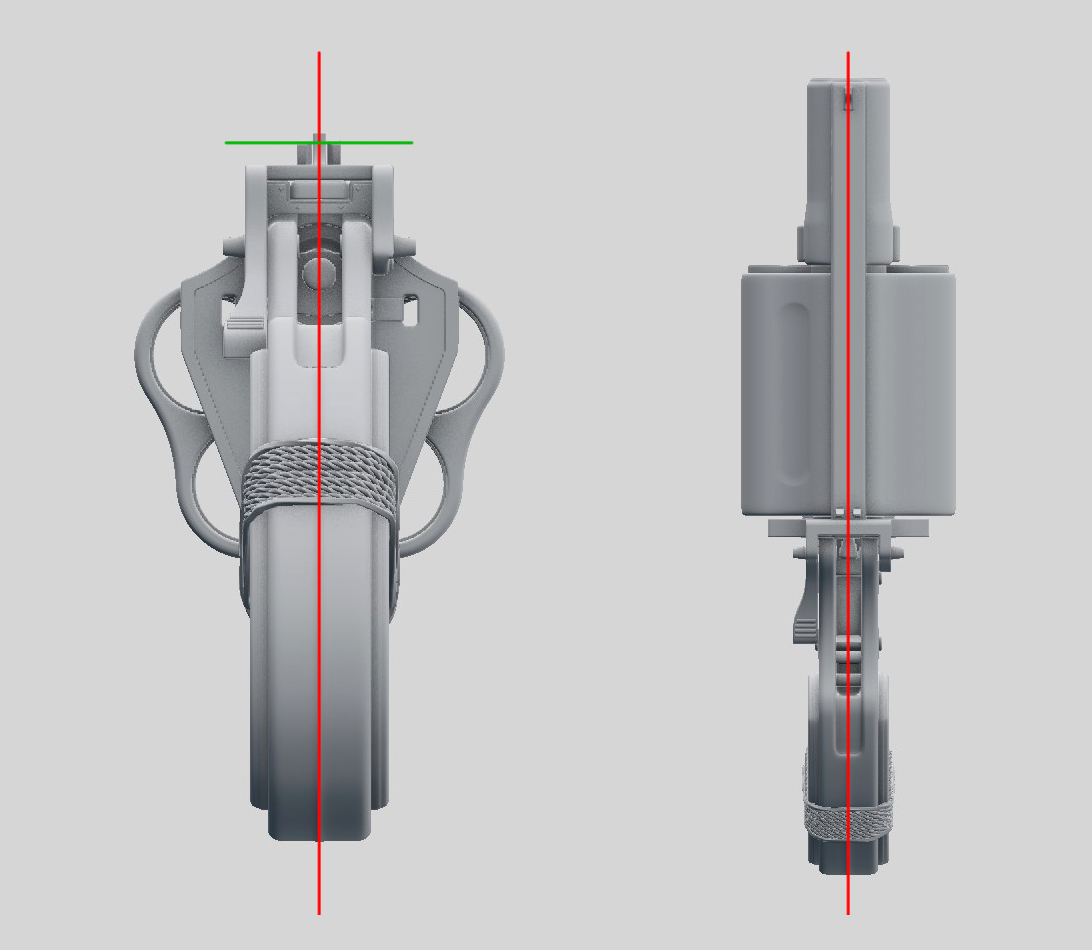
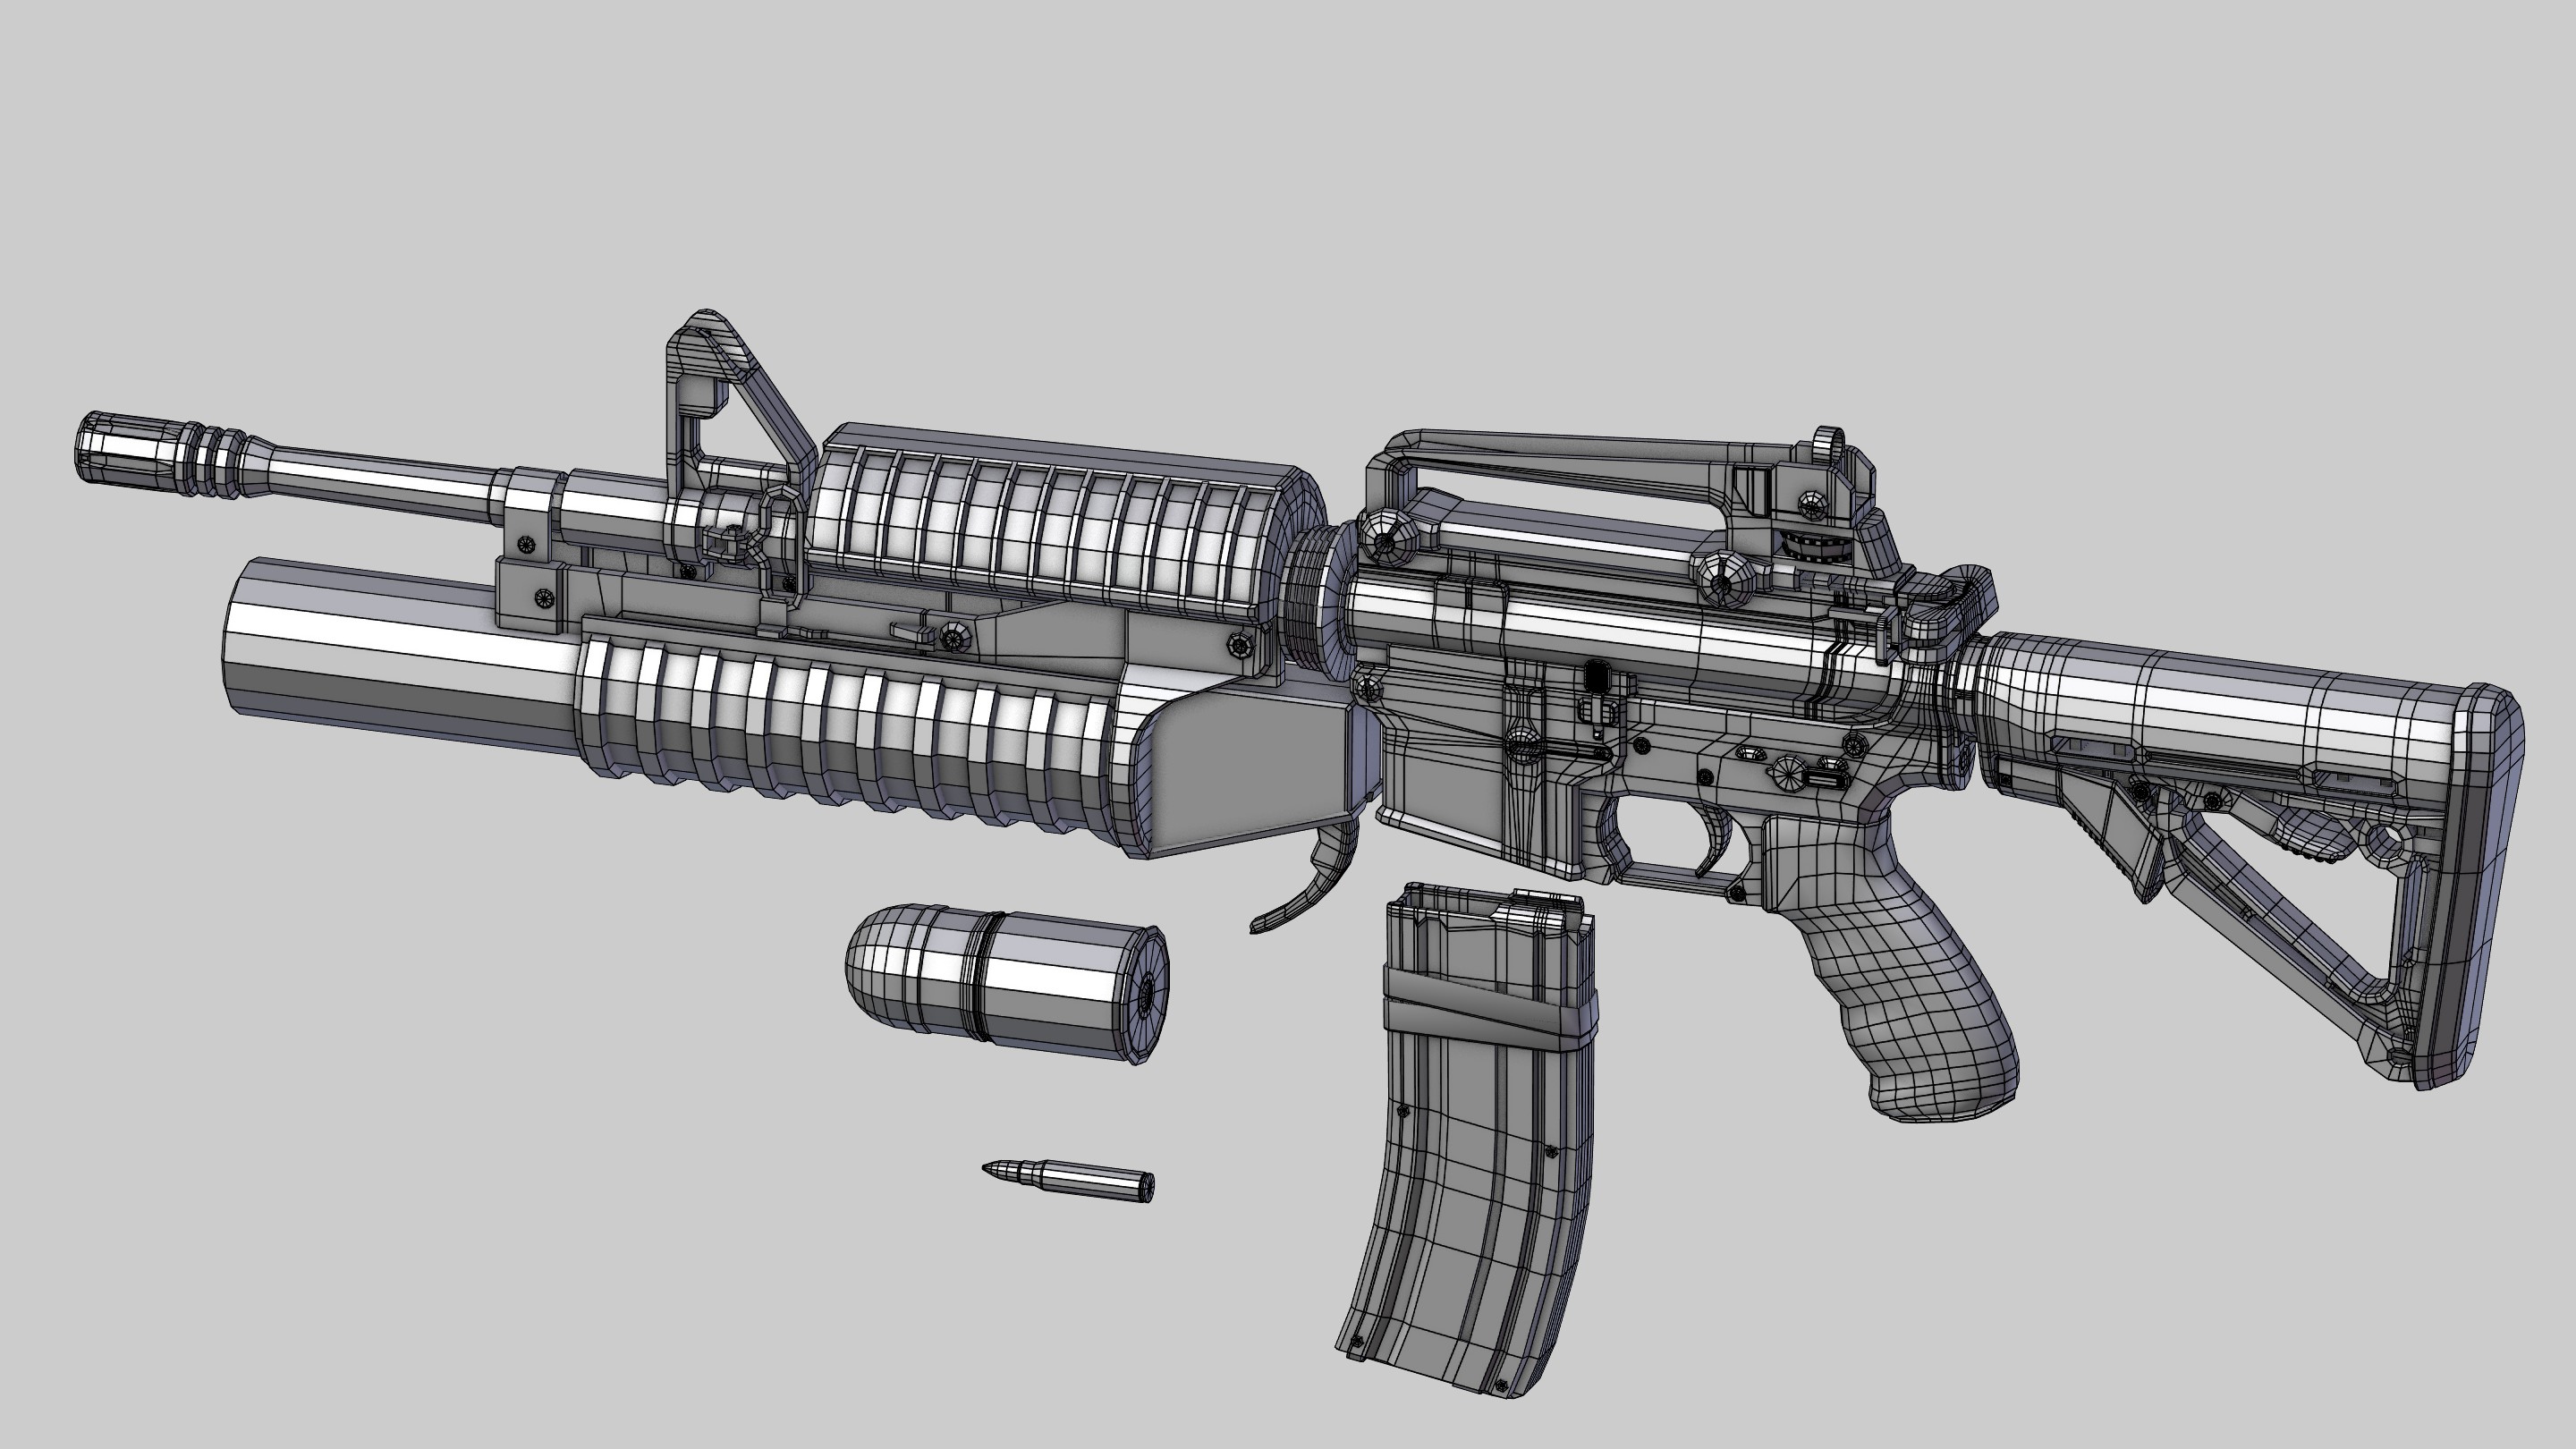
This publication is entirely devoted to the issue of modelling for the FPP kind of view. While creating it, I was trying to recall myself all the problems I have encountered within the last few years, when dealing with this issue. The work is a summary of all the answers to vital questions I had posed and, above all, to those I had no idea of existence. The content is definitely targeted to more advanced graphics. I do not deal with purely technical matters, neither do I explain the basic terms. My work includes elaboration on the entire process of modelling ‒ from the stage of searching for dimensions and proportions down to the last detail. Also topics concerning creation of a low poly model, an UV mapping and an texture baking are discussed. In-depth understanding of the issue required a separate chapter which would describe placing an object in a frame. I had to acquire a similar approach when it comes to designing weapons. Even though, I have concentrated on the issue of translating real models (more adequately on interpretation and transferring them into games), all the matters were analysed from the visual point of view, which is of my particular interest. However, in order to create a correct element (a single model) of art (game) you need to be aware of the requirements it needs to fulfil. Therefore, on few occasions I was made to refer to FPS games’ mechanism.
In The Art of Color Johannes Itten wrote:
Doctrines and theories are best for weaker moments. In moments of strength, problems are solved intuitively, as if of themselves. source
I believe that knowledge gained through experience is worth more that all the sets of rules and tips available. It is, however, much better to create and read about creating simultaneously. The more conscious our approach to the problem, the better the final results.
This text is, in majority, a set of various precious information and tips that I have received from my friends or teachers. Above all, the text includes my thoughts on masterpieces created by contemporary artists. Those were the pieces of art that I have compared my works with in the search for the answer „Why are their works good and mine still require corrections?”.
Also questions asked by people who consider me an expert in this field were extremely valuable. It taught me not only to formulate my thoughts in the right way, but also to raise issues. It enables me to find my own way to share my knowledge and support their artistical development.
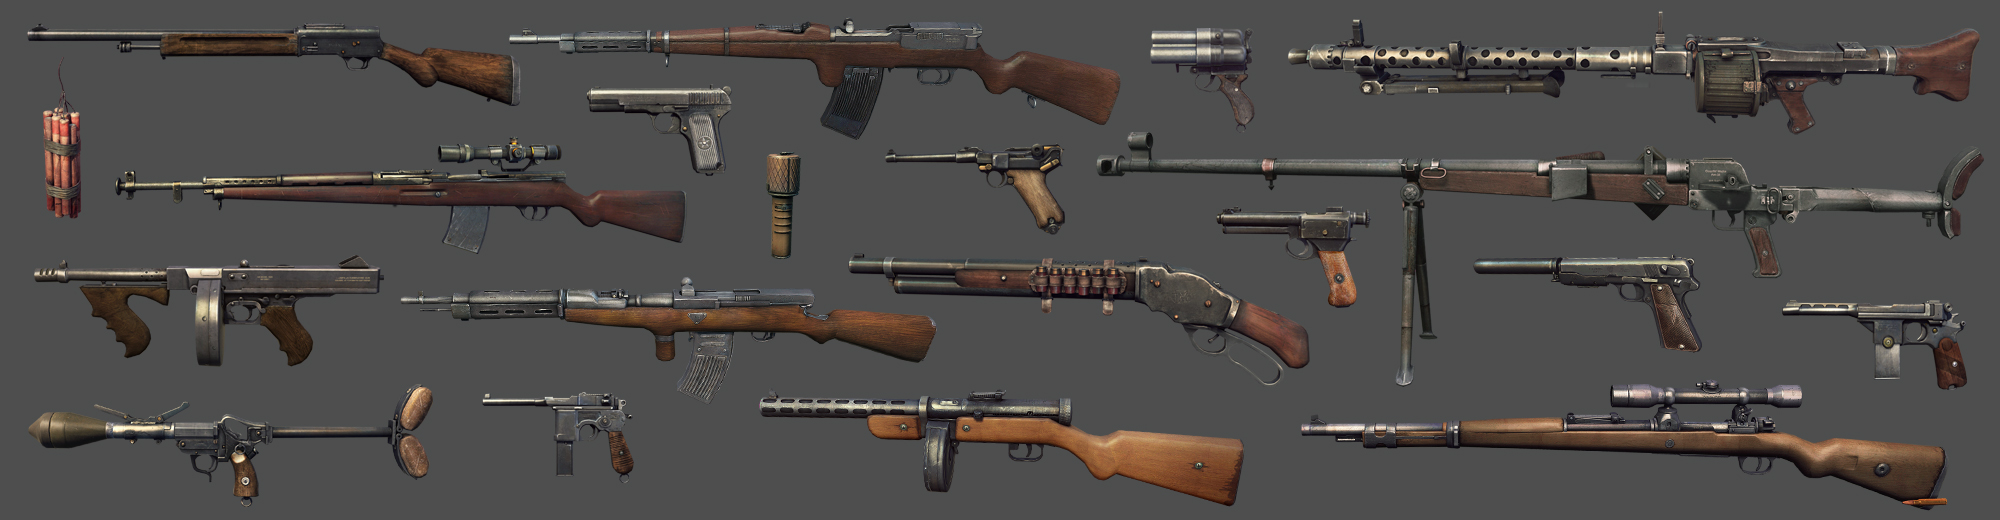
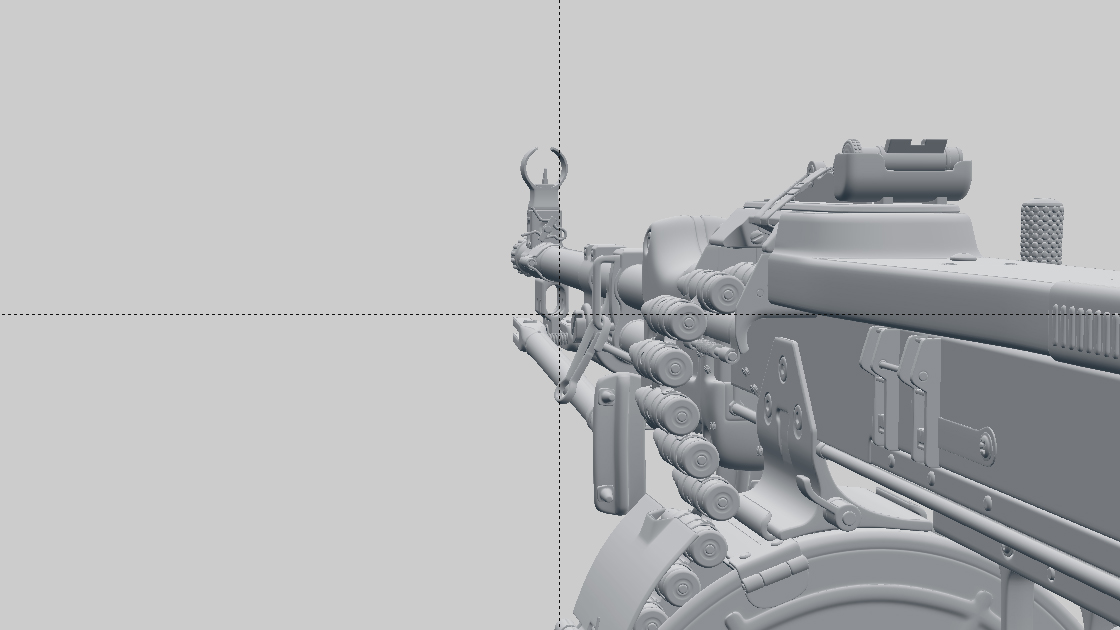
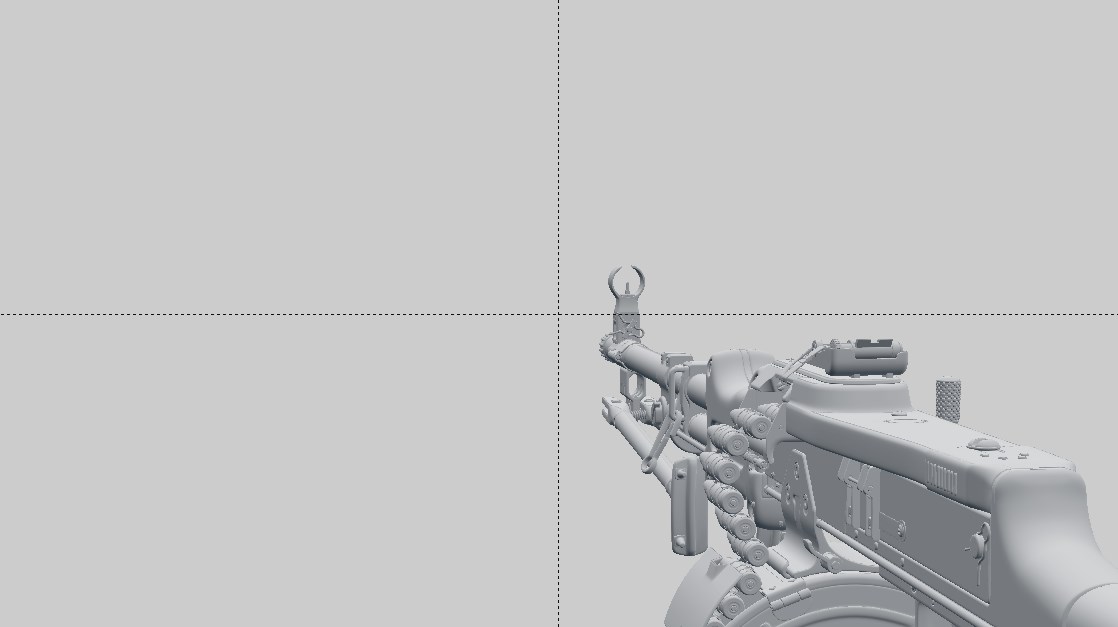
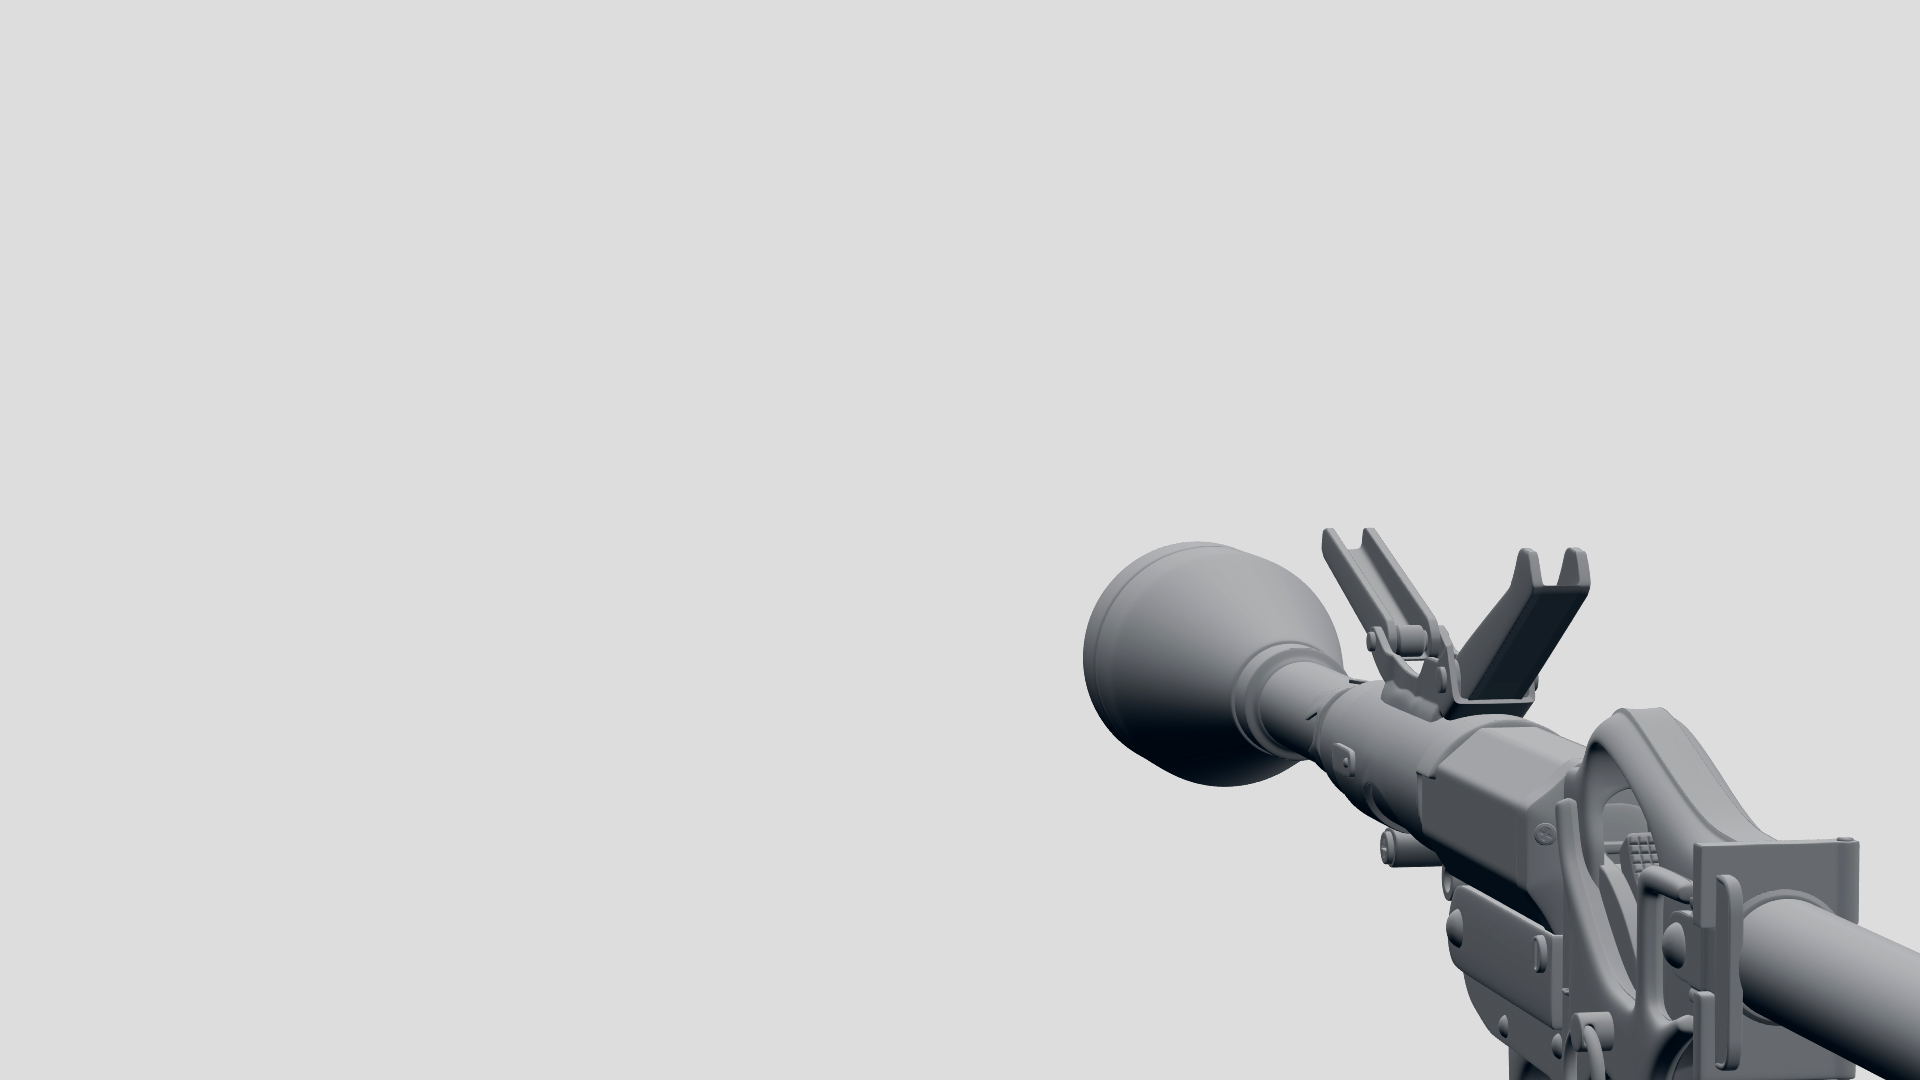
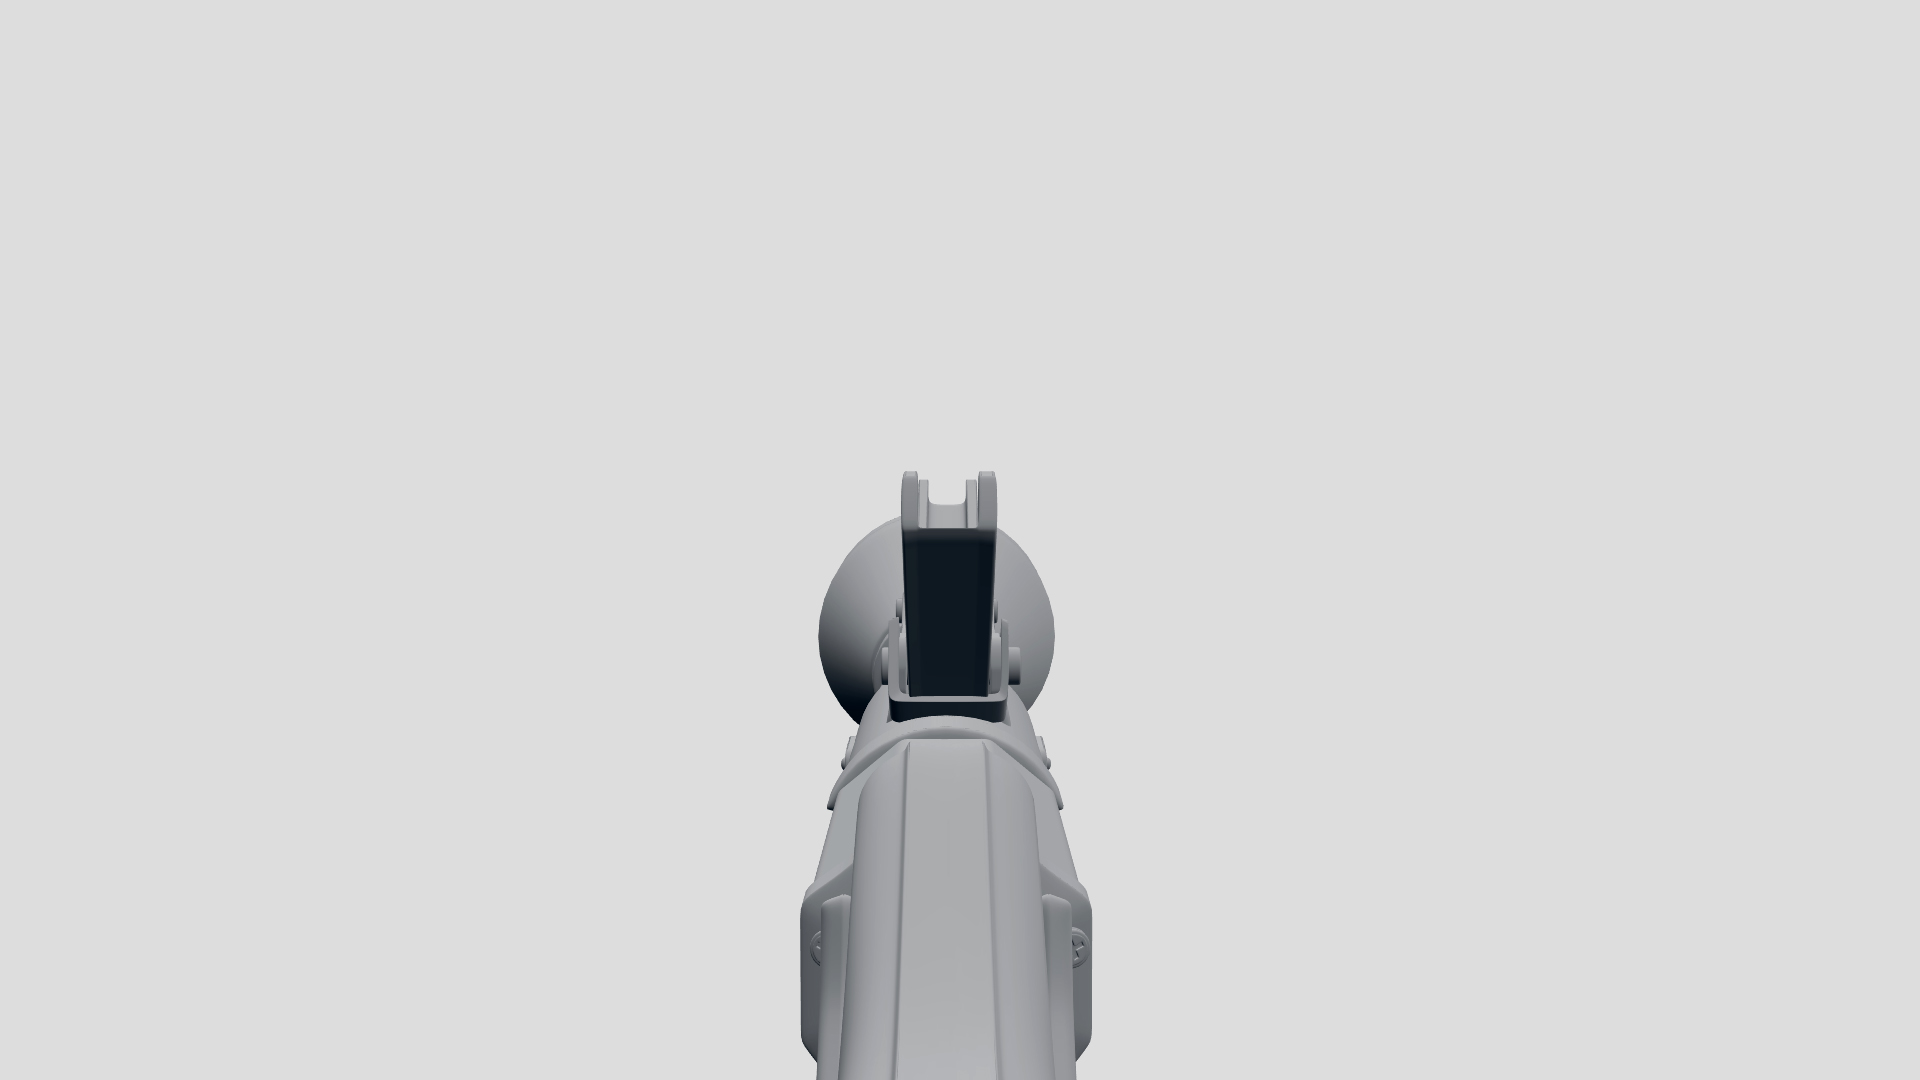
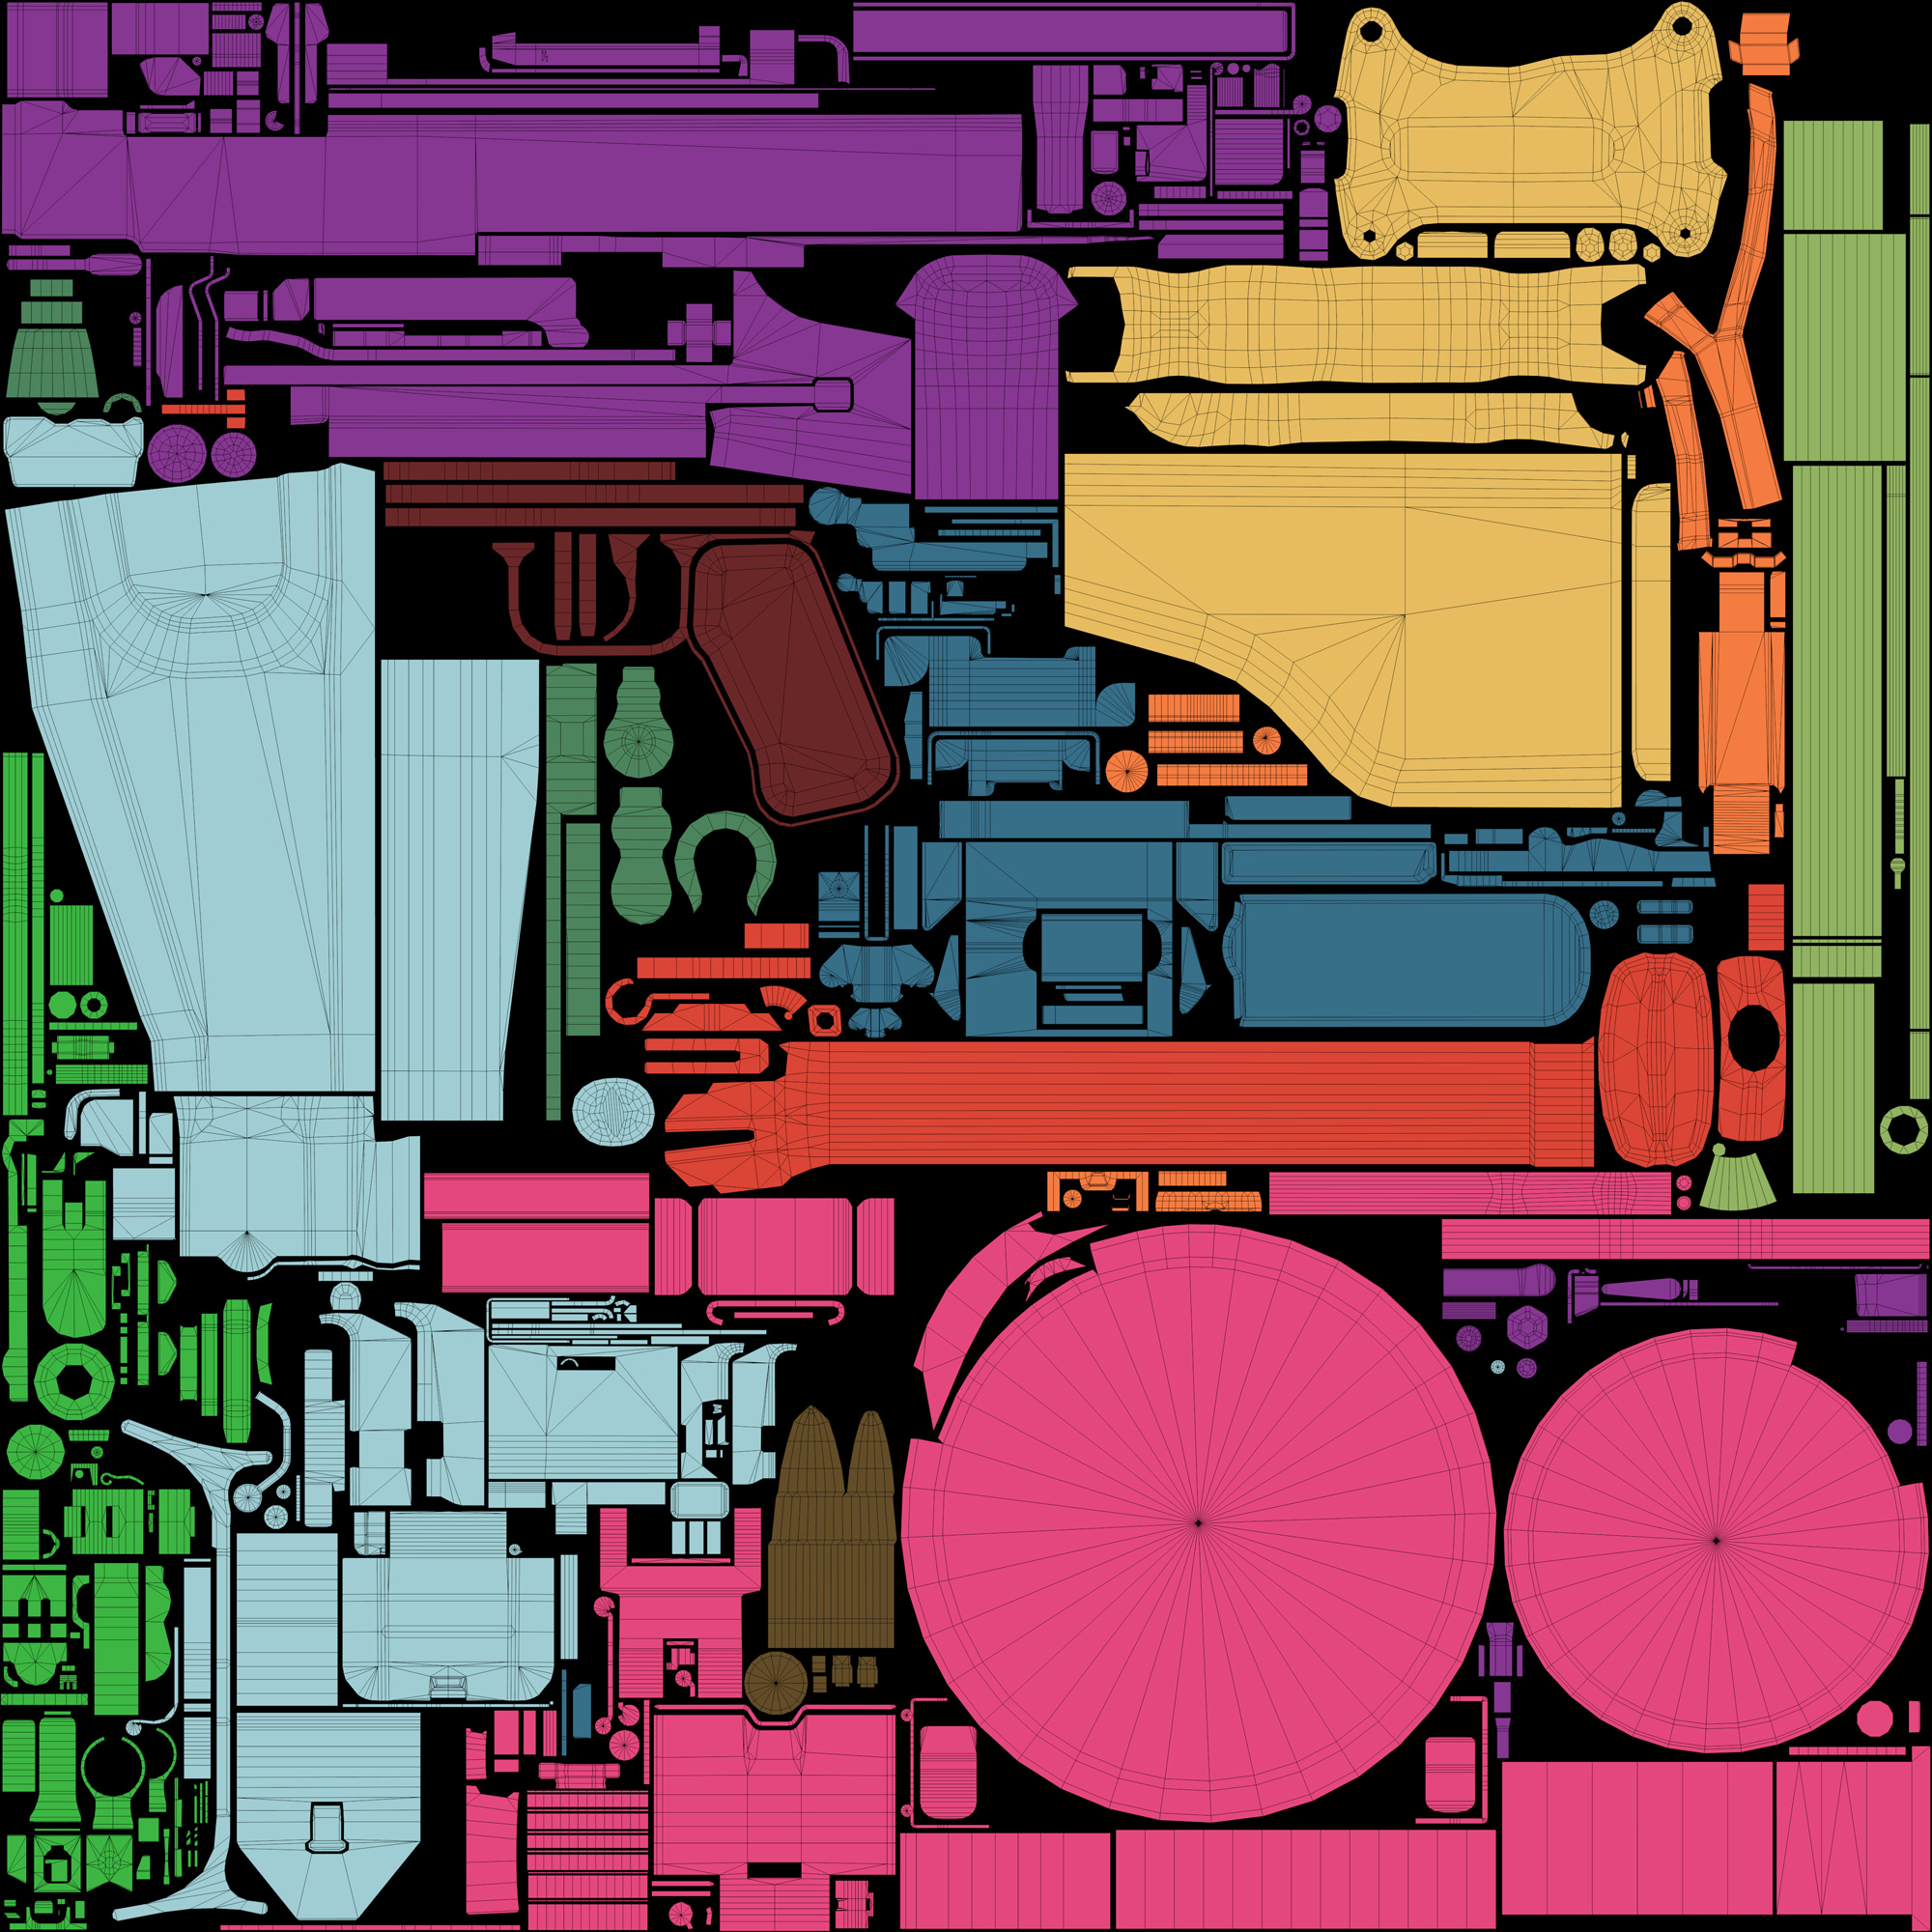
Pictures included in this publication come from video games, artists’ web pages, the Internet databases or from my private archive. Click a picture for its description.
![The Farm 51. <b> Painkiller Hell&Damnation</b> [PC]. Nordic Games, 2012, <i>source: http://www.wsgf.org/dr/painkiller-hell-damnation/en</i>](http://piratportfolio.com/fpp_eng/wp-content/uploads/2015/06/1.1.A_I1.jpg)
![Valve Corporation, Hidden Path Entertainment. <b>Counter-Strike: Global Offensive</b> [PC]. Valve Corporation, 2012, <i>source: https://www.oglasindo.rs/softver/oglas/counter-strike-global-offensive-csgo-9257</i>](http://piratportfolio.com/fpp_eng/wp-content/uploads/2015/06/1.1.A_II.jpg)
![Bungie. <b>Destiny</b> [PS4]. Activision, 2014](http://piratportfolio.com/fpp_eng/wp-content/uploads/2015/06/1.2.A_I.gif)
![2K Marin, 2K Australia. BioShock 2 [PC]. 2K Games, 2010](http://piratportfolio.com/fpp_eng/wp-content/uploads/2015/06/1.2.b_I.jpg)
![2K Marin, 2K Australia. BioShock 2 [PC]. 2K Games, 2010](http://piratportfolio.com/fpp_eng/wp-content/uploads/2015/06/1.2.b_II.jpg)
![Gearbox Software. <b>Borderlands 2</b> [PC]. 2K Games, 2012, <i>source: https://i.ytimg.com/vi/8UQLCWCWYDc/maxresdefault.jpg</i>](http://piratportfolio.com/fpp_eng/wp-content/uploads/2015/06/1.2.C_I.jpg)
![RuneStorm. Viscera Cleanup Detail [PC]. RuneStorm, 2015, source: http://www.runestorm.com/blog/2014/07/14/viscera-cleanup-detail-v0-29-unearthly-excavation/](http://piratportfolio.com/fpp_eng/wp-content/uploads/2015/06/1.3.B_I.jpg)
![Ubisoft Montreal. Far Cry 3 [PC]. Ubisoft, 2012, source: http://www.giantbomb.com/far-cry-3/3030-32933/forums/anybody-else-rocking-a-bow-569599/?page=1#js-message-6186975](http://piratportfolio.com/fpp_eng/wp-content/uploads/2015/06/1.3.B_II.png)
![4A Games. Metro Last Light [PC]. Deep Silver, 2013](http://piratportfolio.com/fpp_eng/wp-content/uploads/2015/06/1.3.B_VI.jpg)
![EA DICE. Battlefield 3 [PC]. Electronic Arts, 2011, source: http://www.aed.com/blog/aed-gave-an-average-joe-some-superhero-swagger/](http://piratportfolio.com/fpp_eng/wp-content/uploads/2015/06/1.3.B_V.jpg)
![People Can Fly, Epic Games. Bulletstorm [PC]. Electronic Arts, 2011](http://piratportfolio.com/fpp_eng/wp-content/uploads/2015/06/2015-12-29_00026.jpg)
![Irrational Games. BioShock [PC]. 2K Games, 2007](http://piratportfolio.com/fpp_eng/wp-content/uploads/2015/06/1.3.B.IV_.jpg)
![4A Games. Metro 2033 [PC]. THQ, 2010](http://piratportfolio.com/fpp_eng/wp-content/uploads/2015/06/2012-12-22_00009.jpg)
![Digital Illusions CE. Battlefield 1942 [PC]. Electronic Arts, 2002, source: http://battlefield.wikia.com/wiki/Hand_grenade](http://piratportfolio.com/fpp_eng/wp-content/uploads/2015/06/1.3.B_III.png)
![Techland. <b>Hellraid</b> [promotional materials]. 2013, <i>source: http://www.gamespot.com/articles/dead-island-dev-s-xbox-one-ps4-pc-co-op-slasher-he/1100-6427508/</i>](http://piratportfolio.com/fpp_eng/wp-content/uploads/2015/06/1.3.A_I.jpg)
![EA Los Angeles. <b>Medal of Honor: Airborne</b> [PC]. Electronic Arts, 2007, <i>source: http://filmovizia.blogspot.com/2012/06/medal-of-honor-airborne.html</i>](http://piratportfolio.com/fpp_eng/wp-content/uploads/2015/06/1.3.A_II.jpg)


![Treyarch. <b>Call of Duty: Black Ops II</b> [PC]. Activision, 2012, <i>source: http://www.imfdb.org/wiki/Call_of_Duty:_Black_Ops_II#TDI_Vector</i>](http://piratportfolio.com/fpp_eng/wp-content/uploads/2015/07/2.1.A_II.gif)
![David Rosen. <b>GDC13 Summary: Animation Bootcamp</b>. http://blog.wolfire.com/ [online]. 2013. <i>source: http://blog.wolfire.com/2013/04/GDC13-Summary-Animation-Bootcamp-Part-5-6</i></div>](http://piratportfolio.com/fpp_eng/wp-content/uploads/2015/07/goldenspiral1.jpg)
![id Software. Rage [PC]. Bethesda Softworks, 2011](http://piratportfolio.com/fpp_eng/wp-content/uploads/2015/07/2014-05-01_00065.jpg)
![id Software. Rage [PC]. Bethesda Softworks, 2011](http://piratportfolio.com/fpp_eng/wp-content/uploads/2015/07/2014-05-15_00002.jpg)
![id Software. Rage [PC]. Bethesda Softworks, 2011](http://piratportfolio.com/fpp_eng/wp-content/uploads/2015/07/2014-05-27_00046.jpg)
![id Software. Rage [PC]. Bethesda Softworks, 2011](http://piratportfolio.com/fpp_eng/wp-content/uploads/2015/07/2014-06-05_00003.jpg)
![Crytek. <b>Crysis 3</b> [PC]. Electronic Arts, 2013, <i>source: http://www.dsogaming.com/pc-performance-analyses/crysis-3-pc-performance-analysis/</i>](http://piratportfolio.com/fpp_eng/wp-content/uploads/2015/07/2.2.A_I.jpg)
![Techland. <b>Call of Juarez: Gunslinger</b> [PC]. Ubisoft, 2013](http://piratportfolio.com/fpp_eng/wp-content/uploads/2015/07/2.2.B.II_.jpg)
![MachineGames. <b>Wolfenstein: The New Order</b> [PC]. Bethesda Softworks, 2014](http://piratportfolio.com/fpp_eng/wp-content/uploads/2015/07/2.2.B.V.jpg)
![Bungie. <b>Destiny</b> [PS4]. Activision, 2014](http://piratportfolio.com/fpp_eng/wp-content/uploads/2015/07/2.2.B.IV_.jpg)
![Treyarch. Call of Duty: World at War [PC]. Activision, 2008, source: http://www.imfdb.org/wiki/Call_of_Duty:_World_at_War](http://piratportfolio.com/fpp_eng/wp-content/uploads/2015/07/2.3.A_VII.jpg)
![Treyarch. Call of Duty: World at War [PC]. Activision, 2008, source: http://www.imfdb.org/wiki/Call_of_Duty:_World_at_War](http://piratportfolio.com/fpp_eng/wp-content/uploads/2015/07/2.3.A_VIII.jpg)
![Treyarch. Call of Duty: World at War [PC]. Activision, 2008, source: http://www.imfdb.org/wiki/Call_of_Duty:_World_at_War](http://piratportfolio.com/fpp_eng/wp-content/uploads/2015/07/2.3.A_III.jpg)
![Treyarch. Call of Duty: World at War [PC]. Activision, 2008, source: http://www.imfdb.org/wiki/Call_of_Duty:_World_at_War](http://piratportfolio.com/fpp_eng/wp-content/uploads/2015/07/2.3.A_I1.jpg)
![Ubisoft Montreal. <b>Far Cry 3</b> [PC]. Ubisoft, 2012, <i>source: http://www.imfdb.org/wiki/Far_Cry_3 </i>](http://piratportfolio.com/fpp_eng/wp-content/uploads/2015/07/2.4.A_I.jpg)

![Yaron Levi. <b>MSBS Call of Duty: Ghosts</b> [portfolio online]. 2013, <i>source: http://yaron-levi.squarespace.com/call-of-duty-ghosts/</i>](http://piratportfolio.com/fpp_eng/wp-content/uploads/2015/08/3.1.A.II_.jpg)
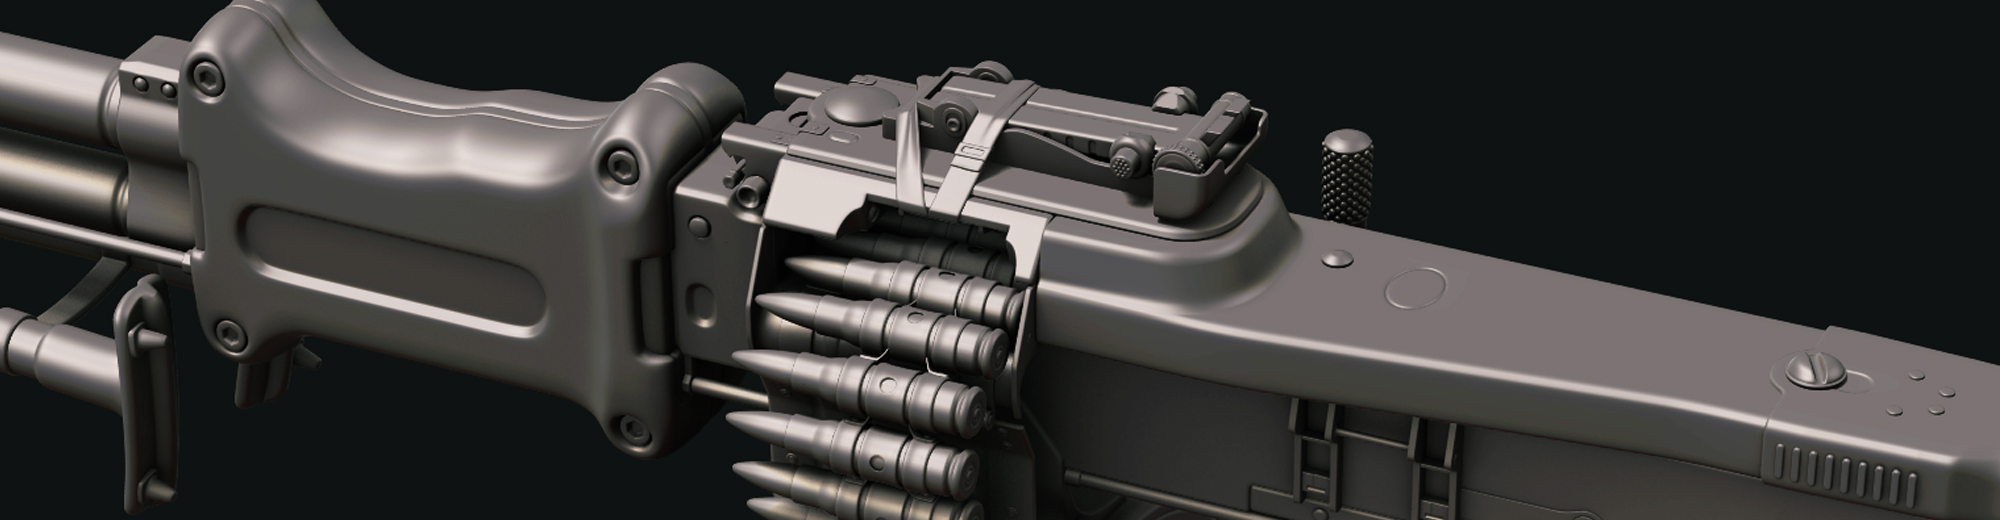
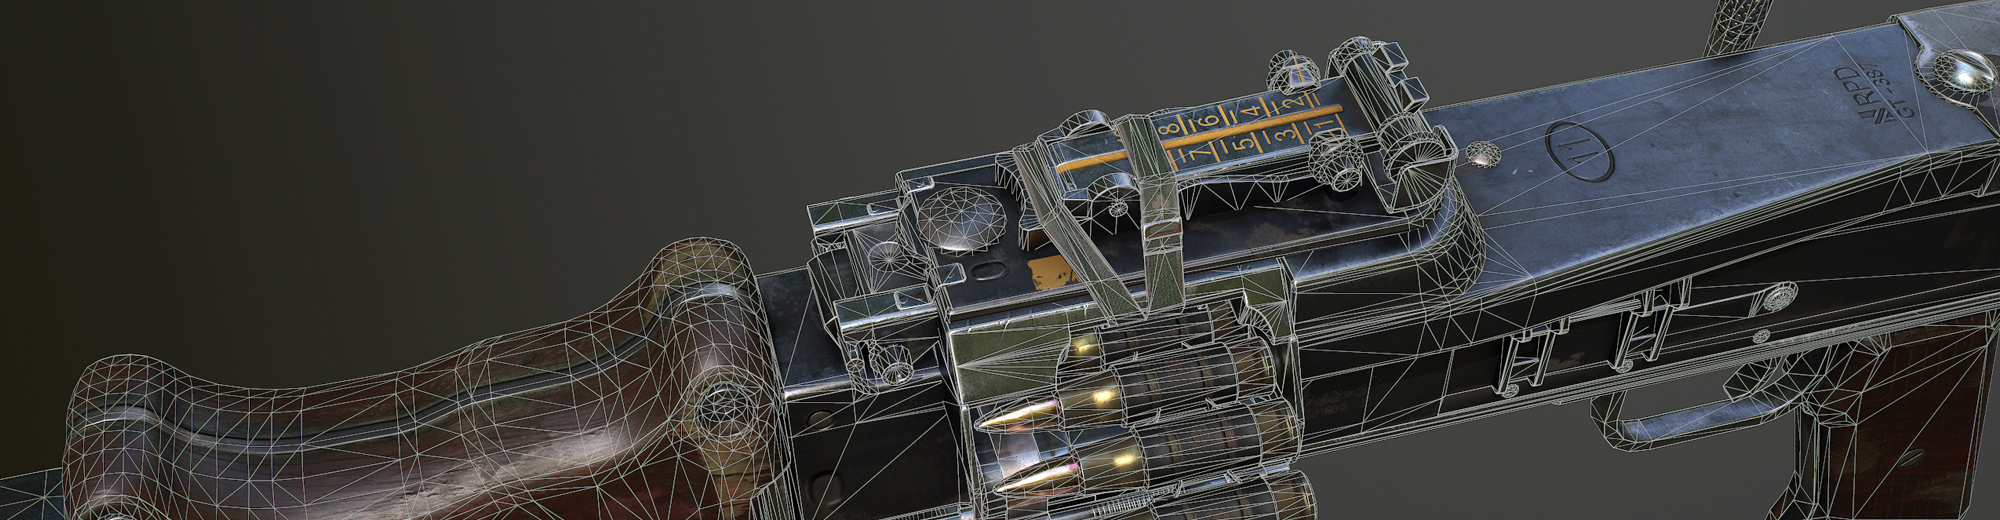
![Ubisoft Montreal. <b>Far Cry 4</b> [PS4]. Ubisoft, 2014, <i>source: http://www.imfdb.org/wiki/Far_Cry_4#FN_Minimi</i>](http://piratportfolio.com/fpp_eng/wp-content/uploads/2015/08/FC4-MKG-71.jpg)
![Andrea Mantegna. <b>Opłakiwanie zmarłego Chrystusa</b>. ok. 1480. [online], <i>source: https://pl.wikipedia.org/wiki/Op%C5%82akiwanie_zmar%C5%82ego_Chrystusa_(obraz_Mantegni)</i>](http://piratportfolio.com/fpp_eng/wp-content/uploads/2015/08/3.3.A_VI.jpg)


![Infinity Ward, Sledgehammer Games. Call of Duty: Modern Warfare 3 [PC]. Activision, 2011, source: http://www.imfdb.org/wiki/Modern_Warfare_3](http://piratportfolio.com/fpp_eng/wp-content/uploads/2015/08/3.4.A.V.jpg)
![Infinity Ward, Sledgehammer Games. Call of Duty: Modern Warfare 3 [PC]. Activision, 2011, source: http://www.imfdb.org/wiki/Modern_Warfare_3](http://piratportfolio.com/fpp_eng/wp-content/uploads/2015/08/3.4.A.VI_.jpg)
![3Point Studios. Brink weapons [online portfolio]. 2011, source: http://www.3pointstudios.com/portfolio_weapons.shtml](http://piratportfolio.com/fpp_eng/wp-content/uploads/2015/08/3.4.A.IV_.jpg)
![3Point Studios. Brink weapons [online portfolio]. 2011, source: http://www.3pointstudios.com/portfolio_weapons.shtml](http://piratportfolio.com/fpp_eng/wp-content/uploads/2015/08/3.4.A.I.jpg)
![3Point Studios. Brink weapons [online portfolio]. 2011, source: http://www.3pointstudios.com/portfolio_weapons.shtml](http://piratportfolio.com/fpp_eng/wp-content/uploads/2015/08/3.4.A.II_.jpg)
![3Point Studios. Brink weapons [online portfolio]. 2011, source: http://www.3pointstudios.com/portfolio_weapons.shtml](http://piratportfolio.com/fpp_eng/wp-content/uploads/2015/08/3.4.A.III_.jpg)
![Valve Corporation. <b>Half-Life 2</b> [PC]. Valve Corporation, 2004, <i>source: http://images.akamai.steamusercontent.com/ugc/66747415956007380/316E8CDE48B751F8208D690D649386FBE0DC844E/</i>](http://piratportfolio.com/fpp_eng/wp-content/uploads/2015/08/3.5.A.II_.jpg)
![Ubisoft Montreal. <b>Far Cry 4</b> [PS4]. Ubisoft, 2014, <i>source: http://guides.gamepressure.com/farcry4/guide.asp?ID=28191</i>](http://piratportfolio.com/fpp_eng/wp-content/uploads/2015/08/3.5.A.I.jpg)
![Techland. <b>Dying Light</b> [PC]. Warner Bros. Interactive Entertainment, 2015, <i>source: http://images.akamai.steamusercontent.com/ugc/23989752526160006/8D5B6C6BB61FBF78B1ED24FBEF1ED30DFD4F3A02/</i>](http://piratportfolio.com/fpp_eng/wp-content/uploads/2015/08/3.5.A.III_.jpg)
![MachineGames. <b>Wolfenstein: The New Order</b> [PC]. Bethesda Softworks, 2014](http://piratportfolio.com/fpp_eng/wp-content/uploads/2015/08/3.5.A_VI.jpg)
![Smith & Wesson Bodyguard model 49 [online]. źródło: https://en.wikipedia.org/wiki/Smith_%26_Wesson_Bodyguard](http://piratportfolio.com/fpp_eng/wp-content/uploads/2015/08/3.5.B.II_.jpg)
![Smith & Wesson model 686 [online]. źródło: https://en.wikipedia.org/wiki/Smith_%26_Wesson_Model_686](http://piratportfolio.com/fpp_eng/wp-content/uploads/2015/08/3.5.B.V.jpg)
![Smith & Wesson model Model 25-5 DA [online]. źródło: http://www.icollector.com/Smith-Wesson-Model-25-5-DA-revolver-45-Colt-cal-6-barrel-blue-finish-checkered-medallion_i11015638](http://piratportfolio.com/fpp_eng/wp-content/uploads/2015/08/3.5.B.I.jpg)
![Colt SAA [online]. źródło: http://www.engravingtransfers.com/les_schowe_colt_45_saa_3.html](http://piratportfolio.com/fpp_eng/wp-content/uploads/2015/08/3.5.B.III_.jpg)
![MachineGames. Wolfenstein: The New Order [PC]. Bethesda Softworks, 2014](http://piratportfolio.com/fpp_eng/wp-content/uploads/2015/08/3.6.A.II_.jpg)
![WE Luger P08 [online]. source: http://airsoftoperator.com/review-luger-p08-4/](http://piratportfolio.com/fpp_eng/wp-content/uploads/2015/08/3.6.A.V.jpg)
![Irrational Games. BioShock Infinite [PC]. 2K Games, 2013,](http://piratportfolio.com/fpp_eng/wp-content/uploads/2015/08/3.6.A.I.jpg)
![Pistolet Mauser Model C96 [online]. źródło: https://pl.wikipedia.org/wiki/Mauser-Werke_Oberndorf_Waffensysteme_GmbH](http://piratportfolio.com/fpp_eng/wp-content/uploads/2015/08/3.6.A.IV_.jpg)
![MachineGames. Wolfenstein: The New Order [PC]. Bethesda Softworks, 2014](http://piratportfolio.com/fpp_eng/wp-content/uploads/2015/08/3.6.A.III_.jpg)
![Valve Corporation, Hidden Path Entertainment. <b>Counter-Strike: Global Offensive</b> [PC]. Valve Corporation, 2012, <i>source: http://images.akamai.steamusercontent.com/ugc/615041741048055148/81569A53AE4C339A123A41FA2ADC73FC662120C1/</i>](http://piratportfolio.com/fpp_eng/wp-content/uploads/2015/08/3.6.X.jpg)
![id Software. DOOM [materiały promocyjne]. Bethesda Softworks, 2015, źródło: http://www.dsogaming.com/screenshot-news/doom-new-quakecon-2015-screenshots-released/](http://piratportfolio.com/fpp_eng/wp-content/uploads/2015/08/3.7.A_VIII.jpg)
![id Software. DOOM [materiały promocyjne]. Bethesda Softworks, 2015, źródło: http://wccftech.com/doom-4k-screenshots-absolutely-breathtaking/](http://piratportfolio.com/fpp_eng/wp-content/uploads/2015/08/3.7.A_VII.jpg)
![Harry C. Mossy stream [online]. source: http://oureverydayadventures.com/?p=1108](http://piratportfolio.com/fpp_eng/wp-content/uploads/2015/08/3.7.A_VI.jpg)
![Pierre Leclerc. Jumbo Rocks In Joshua Tree National Park [online]. source: http://fineartamerica.com/featured/jumbo-rocks-in-joshua-tree-national-park-pierre-leclerc.html](http://piratportfolio.com/fpp_eng/wp-content/uploads/2015/08/3.7.A_V.jpg)
![Kurt Schwitters. Merz. 1931. [online], source: http://blog.naver.com/PostView.nhn?blogId=dongsungbang&logNo=220511691813&redirect=Dlog&widgetTypeCall=true](http://piratportfolio.com/fpp_eng/wp-content/uploads/2015/08/3.7.A_IV.jpg)
![Wojtek Starak. Plaster paint worn [online]. source: http://www.textures.com/download/plasterpaintworn0047/65181](http://piratportfolio.com/fpp_eng/wp-content/uploads/2015/08/3.7.A_I.jpg)
![Kurt Schwitters. Merz. 1931. [online], source: https://www.flickr.com/photos/32357038@N08/3254196713](http://piratportfolio.com/fpp_eng/wp-content/uploads/2015/08/3.7.A_III.jpg)
![Tomasz Przechlewski. Amarillaria mushroom fruiting bodies on tree trunk [online]. source: http://gardendrum.com/2012/11/18/ornamental-tree-diseases-in-sydney/](http://piratportfolio.com/fpp_eng/wp-content/uploads/2015/08/3.7.A_II.jpeg)
![id Software. Rage [PC]. Bethesda Softworks, 2011](http://piratportfolio.com/fpp_eng/wp-content/uploads/2015/08/4.0_I.jpg)
![id Software. Rage [PC]. Bethesda Softworks, 2011](http://piratportfolio.com/fpp_eng/wp-content/uploads/2015/08/4.0_II.jpg)
![<b>M1A Socom 039</b> [online]. <i>source: http://www.kaneohegs.com/</i>](http://piratportfolio.com/fpp_eng/wp-content/uploads/2015/08/4.1.B_IV.jpg)
![Gearbox Software. <b>Borderlands 2</b> [PC]. 2K Games, 2012](http://piratportfolio.com/fpp_eng/wp-content/uploads/2015/08/4.2.A_II1.jpg)
![Reto-Moto. <b>Heroes & Generals</b> [PC]. Reto-Moto, 2014, <i>source: http://imgur.com/5tCPYaA</i>](http://piratportfolio.com/fpp_eng/wp-content/uploads/2015/08/4.2.B_II1.jpg)
![Treyarch. <b>Call of Duty: Black Ops II</b> [PC]. Activision, 2012, <i>source: http://lparchive.org/Call-of-Duty-Black-Ops-II/Update%2007/</i>](http://piratportfolio.com/fpp_eng/wp-content/uploads/2015/08/4.2.B_I.jpg)
![Ubisoft Montreal. <b>Far Cry 3</b> [PC]. Ubisoft, 2012, <i>source: http://www.imfdb.org/wiki/Far_Cry_3</i>](http://piratportfolio.com/fpp_eng/wp-content/uploads/2015/08/4.2.B_III.jpg)
![Lukerichard. <b>Cybergun Cyma Thompson</b> [online]. <i>source: http://s294.photobucket.com/user/lukerichard/media/P1010136.jpg.html</i>](http://piratportfolio.com/fpp_eng/wp-content/uploads/2015/08/4.3.A_III.jpg)
![CI Games. Enemy Front [PC]. CI Games, 2014, źródło: http://www.imfdb.org/wiki/Enemy_Front](http://piratportfolio.com/fpp_eng/wp-content/uploads/2015/08/4.3.A_II.jpg)
![Pterodon Illusion Softworks. Vietcong 2 [PC]. 2k Games, 2005, źródło: http://www.imfdb.org/wiki/Vietcong_2](http://piratportfolio.com/fpp_eng/wp-content/uploads/2015/08/4.3.A_IV.jpg)
![Irrational Games. BioShock [PC]. 2K Games, 2007](http://piratportfolio.com/fpp_eng/wp-content/uploads/2015/08/4.3.A_V.jpg)
![EA Los Angeles. Medal of Honor: Airborne [PC]. Electronic Arts, 2007, źródło: http://www.gamespot.com/reviews/medal-of-honor-airborne-review/1900-6178113/](http://piratportfolio.com/fpp_eng/wp-content/uploads/2015/08/4.3.A_VI.jpg)
![TM 5.1 Hi-Capa [online]. source: http://uk.redwolfairsoft.com/redwolf/airsoft/ReviewDetail?reviewID=197](http://piratportfolio.com/fpp_eng/wp-content/uploads/2015/08/4.3.A_VII.jpg)

![German Rifle Mauser G.33/40 POV [online]. źródło: http://candrsenal.com/gallery/](http://piratportfolio.com/fpp_eng/wp-content/uploads/2015/08/4.3.A_VIII.jpg)

![<b>M1-D Garand Sniper Rifle</b> [online]. <i>source: http://www.militariaauctionsetc.com/firearms_m1-d_garand_cw_smith_carbine#Next</i>](http://piratportfolio.com/fpp_eng/wp-content/uploads/2015/08/163_6396.23183338_large1.jpg)
![Infinity Ward. <b>Call of Duty: Modern Warfare 2</b> [PC]. Activision, 2009, <i>source: http://mw2.gamebanana.com/</i>](http://piratportfolio.com/fpp_eng/wp-content/uploads/2015/08/4.5.A_I.jpg)
![Ben Bolton. Lowpoly Guns [portfolio online]. 2015, source: https://www.artstation.com/artist/benbolton](http://piratportfolio.com/fpp_eng/wp-content/uploads/2015/08/5.1.A_I.jpg)
![Ben Bolton. Lowpoly Guns [portfolio online]. 2015, source: https://www.artstation.com/artist/benbolton](http://piratportfolio.com/fpp_eng/wp-content/uploads/2015/08/5.1.A_II.jpg)

![<b>Heckler & Koch HK69A1 - 40x46mm</b> [online]. <i>source: http://www.imfdb.org/wiki/Heckler_%26_Koch_HK69A1_grenade_launcher</i>](http://piratportfolio.com/fpp_eng/wp-content/uploads/2015/08/piramida1.jpg)
![Reno Levi. <b>Call of Duty - Ghosts</b> [portfolio online]. 2013, <i>source: https://www.artstation.com/artwork/2qaA</i>](http://piratportfolio.com/fpp_eng/wp-content/uploads/2015/08/5.1.B_IIII.jpg)
![Valve Corporation. <b>Portal 2</b> [PC]. Valve Corporation, 2011, <i>source: http://www.playstationlifestyle.net/2011/01/21/hop-into-a-new-world-with-portal-2-screenshots/portal-gameplay-03/</i>](http://piratportfolio.com/fpp_eng/wp-content/uploads/2015/08/5.1.C_IV.jpg)
![Infinity Ward. Call of Duty 4: Modern Warfare [PC]. Activision, 2007, source: https://i.ytimg.com/vi/9Yx1Xz9KtLo/maxresdefault.jpg](http://piratportfolio.com/fpp_eng/wp-content/uploads/2015/08/5.1.C_III.jpg)
![Ben Garnell. Dirty Bomb - Pistols [portfolio online]. 2015, source: https://www.artstation.com/artwork/dirty-bomb-pistols](http://piratportfolio.com/fpp_eng/wp-content/uploads/2015/08/5.1.C_II.jpg)
![Ben Garnell. Dirty Bomb - Pistols [portfolio online]. 2015, source: https://www.artstation.com/artwork/dirty-bomb-pistols](http://piratportfolio.com/fpp_eng/wp-content/uploads/2015/08/5.1.C_I.jpg)

![Patrick Sutton. AKS-74u with Kobra Sight [portfolio online]. 2015, source: https://www.artstation.com/artwork/zDvxQ](http://piratportfolio.com/fpp_eng/wp-content/uploads/2015/08/5.2.A_II.jpg)
![Patrick Sutton. Berthier Carbine with PE Scope [portfolio online]. 2015, source: https://www.artstation.com/artwork/Vy62b](http://piratportfolio.com/fpp_eng/wp-content/uploads/2015/08/5.2.A_I.jpg)
![Ubisoft Montpellier. <b>Rayman</b> [Playstation]. Ubisoft, 1995, <i>source: http://www.firerank.com/liste/lequel-de-ces-jeux-vieux-de-20-ans-vous-rend-le-plus-nostalgique-photos/3966</i>](http://piratportfolio.com/fpp_eng/wp-content/uploads/2015/11/5.3.A_III1.jpg)
![SCE Studio Cambridge. Frogger [PC]. Hasbro Interactive, 1997, source: http://www.abandonia.com/en/games/29609/Frogger+(3D).html](http://piratportfolio.com/fpp_eng/wp-content/uploads/2015/11/5.3.A_II.png)
![SCE Studio Cambridge. Frogger [PC]. Hasbro Interactive, 1997, source: http://www.mobygames.com/game/frogger_/screenshots](http://piratportfolio.com/fpp_eng/wp-content/uploads/2015/11/5.3.A_I.jpg)
![Arkane Studios. Dishonored [PC]. Bethesda Softworks, 2012](http://piratportfolio.com/fpp_eng/wp-content/uploads/2015/11/5.3.A_IV.jpg)
![Arkane Studios. Dishonored [PC]. Bethesda Softworks, 2012](http://piratportfolio.com/fpp_eng/wp-content/uploads/2015/11/5.3.A_VI.jpg)
![Racer 445. <b>Normal_edge_thickness</b> [online]. <i>source: http://wiki.polycount.com/wiki/Normal_Map_Modeling#Edge_Thickness</i>](http://piratportfolio.com/fpp_eng/wp-content/uploads/2015/11/Normal_edge_thickness1.jpg)
![Michał Anioł. Madonna z Burgii. 1503. [online], źródło: http://static.turistipercaso.it/image/b/belgio/belgio_tgu3t.T0.jpg](http://piratportfolio.com/fpp_eng/wp-content/uploads/2015/11/5.4.A_II1.jpg)
![Michał Anioł. Pietà watykańska. 1500. [online], źródło: http://eyesoffaithdc.com/?p=332](http://piratportfolio.com/fpp_eng/wp-content/uploads/2015/11/5.4.A_III.jpg)
![Pedro Amorim. <b>Homebrew Shotgun</b> [portfolio online]. 2014, <i>source: http://www.edgesize.com/index.html</i>](http://piratportfolio.com/fpp_eng/wp-content/uploads/2015/11/pobrane.png)

![Yaron Levi. <b>M1887 Call of Duty: Modern Warfare 3</b> [portfolio online]. 2013, <i>source: http://yaron-levi.squarespace.com/call-of-duty-modern-warfare-3/</i>](http://piratportfolio.com/fpp_eng/wp-content/uploads/2015/11/5.5.B_I.jpg)
![Alan Van Ryzim. <b>BattleRifle</b> [portfolio online]. 2015, <i>source: http://polygoo.com/battlerifle</i>](http://piratportfolio.com/fpp_eng/wp-content/uploads/2015/11/5.5.B_II.jpg)
![Reno Levi. <b>Call of Duty - Ghosts</b> [portfolio online]. 2013, <i>source: https://www.artstation.com/artwork/2q3y</i>](http://piratportfolio.com/fpp_eng/wp-content/uploads/2015/11/5.5.C_III.jpg)
![Pistolet czarnoprochowiec skalkowy [online]. source: http://imged.pl/pistolet-czarnoprochowiec-skalkowy-2650683.html](http://piratportfolio.com/fpp_eng/wp-content/uploads/2015/11/5.5.C_I.jpg)
![LONG climbing shotgun XVIII century [online]. source: http://globalreplicas.com/en/long-climbing-shotgun-xviii-century.html](http://piratportfolio.com/fpp_eng/wp-content/uploads/2015/11/5.5.C_II.jpg)
![Foret08 [online]. source: http://www.boolsite.net/images/wallpapers/Nature_Paysages/Forets/Foret08.html](http://piratportfolio.com/fpp_eng/wp-content/uploads/2015/11/5.6.A_II.jpg)
![Textures.com, Buttons0001 [online]. source: http://www.textures.com/download/buttons0001/7187](http://piratportfolio.com/fpp_eng/wp-content/uploads/2015/11/5.6.A_III.jpg)
![Thomas Klieber, MachineryHeavy0032 [online]. source: http://www.textures.com/download/machineryheavy0032/13691](http://piratportfolio.com/fpp_eng/wp-content/uploads/2015/11/5.6.A_IV.jpg)
![Texas Street in Luling after sidewalk construction [online], source: http://www.befcoengineering.com/sidewalk_pictorial%20.html](http://piratportfolio.com/fpp_eng/wp-content/uploads/2015/11/5.6.A_VII.jpg)
![MachineGames. Wolfenstein: The New Order [PC]. Bethesda Softworks, 2014](http://piratportfolio.com/fpp_eng/wp-content/uploads/2015/11/ar60_04.jpg)
![Textures.com. Buttons0150 [online]. source: http://www.textures.com/download/buttons0150/46667](http://piratportfolio.com/fpp_eng/wp-content/uploads/2015/11/5.6.A_V.jpg)
![Goldspurs09. Leupold VX-R Patrol 1.25-4x [online]. source: https://youtu.be/IuZbM7Jxmt8?t=1m10s](http://piratportfolio.com/fpp_eng/wp-content/uploads/2015/11/5.6.A_VI1.jpg)
![Alan Van Ryzim. Magpul Massada [portfolio online]. 2014, source: http://polygoo.com/masada](http://piratportfolio.com/fpp_eng/wp-content/uploads/2015/11/acr.jpg)
![Enrico Santi. Tavor X95 [portfolio online]. 2015, source: https://www.artstation.com/artwork/2q3y](http://piratportfolio.com/fpp_eng/wp-content/uploads/2015/11/5.7.A_III.jpg)
![Trijicon ACOG TA31 BAC Rifle Scope 4x 32mm Dual-Illuminated Horseshoe Dot 223 Remington Reticle with TA51 Flattop Mount Matte [online]. source: http://www.midwayusa.com/product/1583138947/trijicon-acog-ta31-bac-rifle-scope-4x-32mm-dual-illuminated-horseshoe-dot-223-remington-reticle-with-ta51-flattop-mount-matte](http://piratportfolio.com/fpp_eng/wp-content/uploads/2015/11/5.7.A_I.jpg)
![Arkane Studios. <b>Dishonored</b> [PC]. Bethesda Softworks, 2012](http://piratportfolio.com/fpp_eng/wp-content/uploads/2015/11/5.8.A_III.jpg)
![<b>Sturmgewehr 44</b> [online]. <i>source: http://www.muzeumwp.pl/emwpaedia/karabin-automatyczny-sturmgewehr-44.php</i>](http://piratportfolio.com/fpp_eng/wp-content/uploads/2015/11/5.8.A_I1.jpg)
![<b>Unique FN 1900 Copy Melior Semi-Automatic Pistol</b> [online]. <i>source: http://www.rockislandauction.com/viewitem/aid/64/lid/1506</i>](http://piratportfolio.com/fpp_eng/wp-content/uploads/2015/11/5.8.A_II1.jpg)

![EA DICE. <b>Battlefield 4</b> [PC]. Electronic Arts, 2013, <i>source: http://www.imfdb.org/wiki/Battlefield_4#GP-30M</i>](http://piratportfolio.com/fpp_eng/wp-content/uploads/2015/11/BF4GP3001.jpg)

![Valve Corporation. <b>Team Fortress 2</b> [PC]. Valve Corporation, 2007, <i>source: http://www.neogaf.com/forum/showpost.php?p=47497145&postcount=267</i>](http://piratportfolio.com/fpp_eng/wp-content/uploads/2015/11/6.5.A_IV.jpg)


![Textures.com. Lights0033 [online] source: http://www.textures.com/download/lights0033/46675](http://piratportfolio.com/fpp_eng/wp-content/uploads/2015/11/7.3.jpg)
![Textures.com. Lights0033 [online] source: http://www.textures.com/download/lights0033/46675](http://piratportfolio.com/fpp_eng/wp-content/uploads/2015/11/7.3.A_II.jpg)


